Creating an advanced filter
You can create an advanced filter that allows you to create very precise conditions in a single filter. To create an advanced filter, you must define one or more parameters (or filter nodes) joined with logical AND, logical OR, or logical NOT statements.
To create an advanced filter:
1. Do one of the following to display the list of filters:
• On the menu, click
• Click the Filters view in an open capture window
• Click the Filters options in the Capture Engine Capture Options dialog
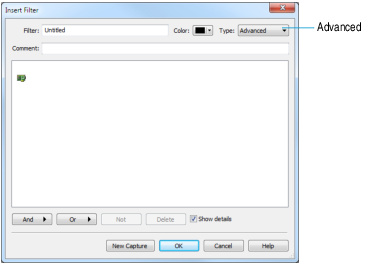
2. Click . The Insert Filter dialog appears.
3. Select Advanced in the Type list. The Advanced view of the Insert Filter dialog appears. The dialog displays a green icon representing a network adapter.
4. Define one or more filter nodes by or and selecting and defining one of the available filter parameters. See also Filter types for a description of the available filter types.
Each time you create a filter node, a dialog appears that lets you define the filter node. Each filter node added to the filter is displayed showing the relationship between the network adapter and the capture buffer (represented by a computer icon). See also Logical AND, OR, and NOT operators in advanced filters.
NOTE: Click on the dialog to learn more about the available options and settings.
5. Complete the rest of the Insert Filter dialog and click . The new filter is now available whenever a list of available filters is displayed.